Bolting


Some plants can't take the heat. Cilantro is a plant that does better in cool and moist conditions, so when it becomes too hot for the plant it has a survival mechanism. Bolting is what happens when a plant decides it's time to think about reproduction (seed making) to ensure a new generation survives through the heat. Here are two cilantro plants - one has bolted, the other hasn't yet. 

Normal cilantro.jpeg

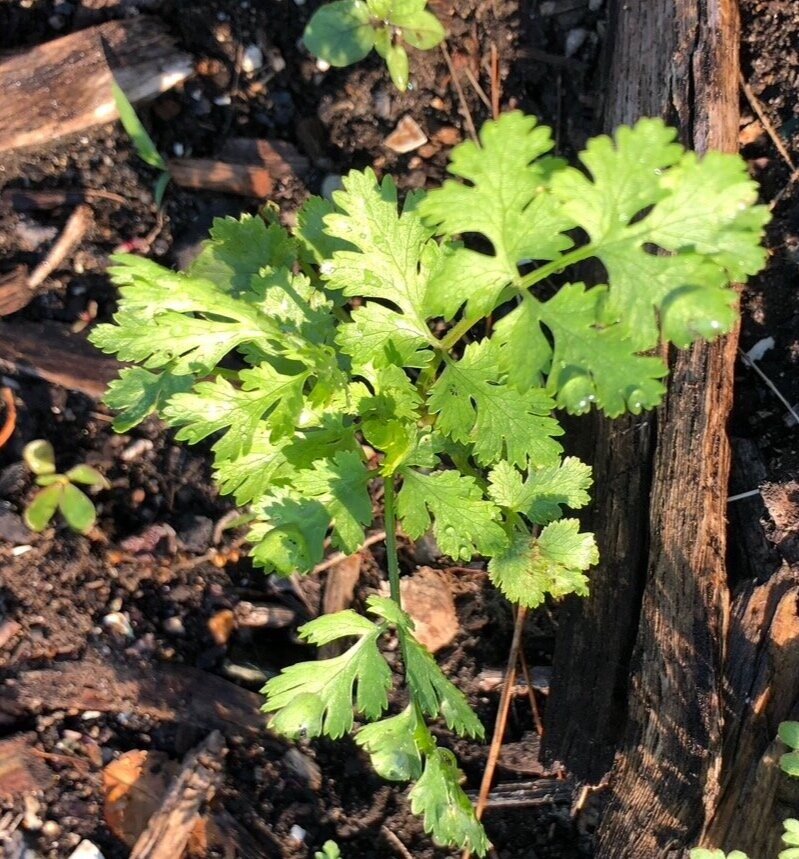
Normal cilantro (which is a volunteer - self-seeded from last year).

Bolted cilantro.jpeg

Bolted cilantro. Notice that the shape of the leaves has changed - they are much more needle-like as opposed to the normal cilantro which is a little rounder and fuller looking.


Unfortunately, once a plant bolts the taste changes a lot, usually for the worse as it becomes more bitter and tough. However, in some cases the seeds are also edible - cilantro seeds are also called coriander, and can be dried and ground for many styles of flavoring

Other plants that bolt are basil, lettuce, spinach, broccoli, certain herbs and other non-fruiting plants


Row cover

 
Row cover.jpeg

We had peppers and eggplants under row cover since we planted them, but I checked and noticed that they are both beginning to flower. 

The pollinators (bees, butterflies, moths, etc.) need to get into those flowers, so that means it's time to remove the row cover. 

Peppers and eggplants.jpeg

The plants look big and healthy, as do all the weeds! Hopefully the plants are big enough now to withstand any attack by flea beetles or other pests.

We’ll save both the row cover and the ground staples for the next time we need to use them.


Planting potatoes


On a cold and drizzly day in spring, it’s nice to know that you’ve already got some crops in the ground. Potatoes can be planted during the spring, before the last frost date in your area. One problem with potatoes is that they can take up a lot of room in your garden. The traditional way to plant them is to place the seed potatoes in a trench 4-6 inches deep, wait for the plants to grow 6-8 inches tall, and then hill more soil around the stems. The problem is that you have to pile up the soil from your trench until you are ready to hill.

IMG_1365.jpg

There are some other options, which involve growing potatoes in containers. We’re trying a couple of these in the Community Growing plot this year. The first method is a grow bag. This is a fabric bag specifically made for container growing. We filled the bag with 4-6 inches of soil mixed with compost, placed the seed potatoes into the soil mix , and covered them with another 4-6 inches of soil mix. 

IMG_1375.jpg

Once our second shipment of seed potatoes arrive, we’ll try two or three other techniques we’ve read about: a rigid container, an old plastic bag that compost or mulch came in, and a chicken wire tower. We’ll show you the results as the season goes on, and compare harvests.

-Suzanne


Planting peas


It’s the perfect time to start planting peas in your garden! Peas thrive in cooler weather, and do best in temperatures of 65 to 70 degrees. 

Snap peas

We chose to plant Organic Sugar Snap Peas from Johnny’s Selected Seeds, in Fairfield, Maine. “For 48 years Johnny’s has set the standard for high seed quality, meeting or exceeding federal minimum requirements for germination rates, pathogen testing, and traceability.”

We inoculated the peas at the time of planting. We used an inoculant from Pinetree Garden Seeds in New Gloucester, Maine. This product is added to the soil just before putting in the seeds, other products suggest soaking the seeds in moistened inoculant overnight. This process improves the growth and production of peas through the introduction of rhizobia bacteria. 

Peas

Next, we prepared the garden bed by removing all the old roots and weeds, and raking the soil to loosen it up. We used two panels of extra lattice we had on hand to make a trellis so the peas have somewhere to climb as they grow.

Finally, we planted the peas! We planted two rows of peas, about 1-2 inches apart. We covered them loosely with landscaping cloth to keep out unwanted critters. 

Now, the peas will need a deep watering once a week, and it will take about 6-8 weeks until they are ready to harvest.

-Jenny


Planting garlic


The final chore of the fall garden: Jenny and Suzanne planted garlic

IMG_5250.jpg

We were up at the Victory Gardens last week, taking advantage of one of those warm afternoons, to put garlic in the ground for next summer’s crop. We love the idea that just before the ground freezes for the long winter months, we can start next spring’s new growth. We chose the largest cloves from last summer’s crop to plant. 

We cleared the bed of weeds, leaves and plant debris, and raked it smooth. Then we marked out a grid 6 inches by 6 inches and placed each clove in a hole about 4 inches deep. The cloves went in base down and tip up.

IMG_5256.jpeg

After covering them with soil, we added a light layer of compost, to help feed the garlic. Then we spread a layer of salt marsh hay over the bed, again, about 6 inches high. The salt marsh hay is intended to protect the garlic from repeated freeze/thaw cycles during the winter. We could have waited for the ground to freeze before spreading the hay, thus insulating the frozen ground. But we were worried we might forget, and it’s always worked to spread the hay at the time of planting.

The cloves will begin putting down roots, and the tips will start to grow in the spring. We use stiffneck varieties, so the earliest product of the plants will be the scapes they put out in early summer.

-Suzanne